I have been thinking about writing this tutorial for my readers for sometimes. I find no one offering the best solutions to take Google calendar with you while you are offline. I have seem people reading about how to sync Thunderbird between computers. That is one of of the most popular post on this blog. I am so glad that many people have enjoyed the benefits from that post.
Now I found no one posting the tips and tricks about how to sync Google Calendar with Thunderbird and Lighting, so you can take Google Calendar with you while traveling. Most of the information you found on the Internet are all about how to sync with Google calendar with HTTP sync while you are on the Internet. The problem is that when you unplug your computer from the Internet or shutdown your wireless access, you lost the calendar. You can’t modify or add event at all.
This is where Thunderbird and Lighting come to rescue.
People tend to create offline calendar on their computer, but they can’t get their calendar sync to the Google Calendar. The solutions is fairly simple. I am wondering why no one offering such solution. So please read on, if you would like to know how to take Google Calendar with you. Here is the goal of this post.
Sync Google Calendar with Thunderbird and Lighting on your computer with a local copy of Google Calendar.
Requirements:
 Thunderbird – The best of the best email client on the Internet. It’s open source and it’s free.
 Lightning – The add-on and plug-in for Thunderbird. So you can read your email and mange your schedule and events in Thunderbird.
 GCALDaemon – The core Daemon that runs as system service and sync data between Google Calendar and your local calendar.
 Google Calendar – The best web based calendar on the Internet. Period!
Problems:
I think one of the reasons that no one bring the solution to public attention is that the tutorial on GCAlDaemon did not mention the offline file syncing solution for Thunderbird. It only show you how to use HTTP-based syncing with Sunbird / Lightning. Or it shows how to use Rainlendar for file-based syncing. My solution is to use File-based sync with Lightning on Thunderbird.
Solutions:
I am going to show you how to setup your file-based sync to take Google Calendar with you. I assume that you already have Thunderbird and Lightning installed on your computer. I also assume that you have Google Calendar Account. So let’s have some fun!
Step 1: Create Google Calendar Account, if you don’t already have!
If you don’t have Google Calendar account. Be sure to get one! You don’t have to create new GMAIL account to user Google Calendar. You can use your existing email as well. However, I would suggest you to create a Gmail account. You will be enjoying more features offered by Google.
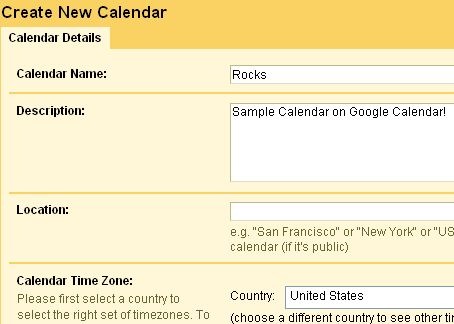
Step 2: Add new Calendar on Google Calendar!
Create a new calendar on Google. Let’s assume that you just created a new calendar called “Rocks“.
You can share and change the color of the Calendar. It will look like this.
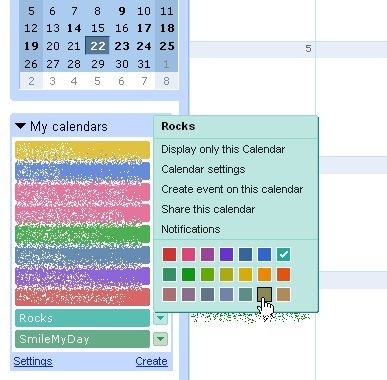
You can add a test event on Google Calendar to test the synchronization later.
Step 3: Install GCALDaemon to sync your Google Calendar
Install GCALDaemon on your computer. In my case, I install it on my Window XP. I always like to know what is installed on my computer. So I decided to download the Zip Archive version instead of Installer. You can simply unzip the files to the folder you preferred. In my case, I unzip the file under my Thunderbird folder so I can sync between computers as well. It will looks like this.
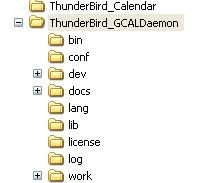
You will find few files under the Bin folder, which you will be using to run GCALDaemon as system service. So it will automatically sync your calendar every N minutes.

Step 4: Config GCALDaemon to store your offline Calendar files.
You can now run Service-install.bat to install GCALDaemon as system services. Or you can simply click on Sync-now.bat to sync when ever you want to. In my case, I do both. I create a short-cut on my desk. So I can sync the calendar at real time. Or it will just run itself every 5 minutes. Now we need to run config-editor.bat to setup the file-based sync with Google Calendar.
Double click Config-editor.bat to open the configuration Interface.

In my case, I will save the configuration file under Thunderbird_GCALDaemmone/work folder. You can adjust other setting based on your need.
Step 5: Link you Google Calendar account to your local Calendar files.
Now we need to setup file synchronizer. This is where other tutorial won’t tell you to do. All the tutorials on the Internet are telling you to use HTTP synchronizer to sync your Google Calendar. We will be using File based sync, so you can take Google Calendar with you. Click on File Synchronizer to open the interface.
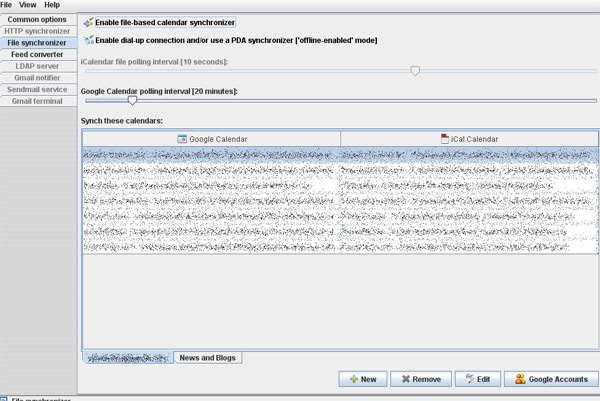
As you see, I already have few calendar created. You should just see an empty list of calendar in the interface. Click on the button on the right bottom corner – “Google Accounts” to open the account interface.
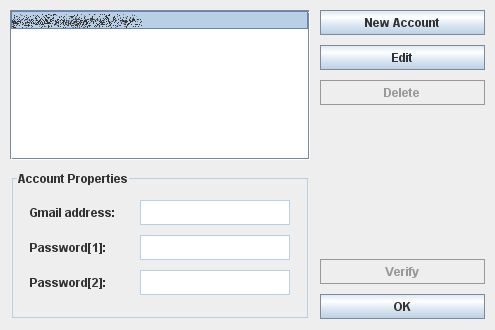
You can simply add your Google Calendar Account and press OK. You can add as many account as you wish.
Go back to the previous interface and press New button to create a new file-based calendar file. You can now see your account list in the Google Account Drop Down. Click on Refresh button to load your calendar list from Google Calendar. You should see “Rocks” in the list.
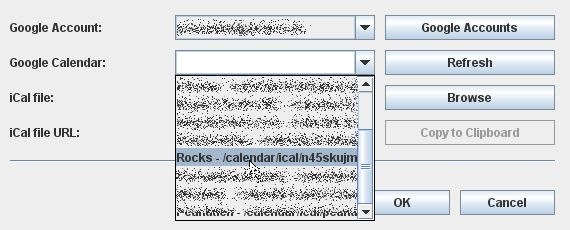
Choose the destination for your new iCal file. I choose somewhere on my disk under Thunderbird email folder, so I can sync them between computers. Press OK to complete. Now you see a new calendar listed under your account.
[UPDATE 2010-07-13] Where to find the iCal file on your computer?
I have been asked by many of my readers about where to find the iCal file on your computer. I apologize that I did not make it clear. This article was created in 2008. So here is the answer.
Create an empty text file at the destination folder on your computer and name the empty text file with ics extension. You then choice the file from the iCal file dropdown menu or browse to the file.
Remember to enable File-based calendar synchronizer (The button on top of the screen).
Remember to save the configuration by click Save under File menu.
Double click on the Sync-now.bat file, where you install the GCALDaemon to sync your Google Calendar the first time. It will automatically create the offline file, where you set your iCal file. You can close GCALDaemon now.
Step 6: Link Google Calendar with your offline Calendar file in Thunderbird + Lightning.
Now the final step is to add the offline file (iCal file) to thunderbird + Lightning. Open your Thunderbird and go to your calendar interface.
Under the File menu, choose Open -> Calendar File. We want to open the offline iCal file and make it part of our Calendar. So it will sync with Google Calendar whenever we are online.
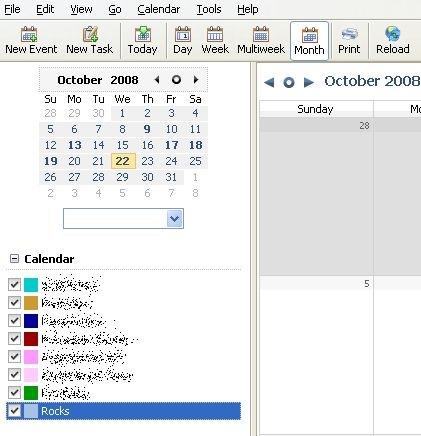
Now you see “Rocks” list as one of the Calendars. Unfortunately, there is no way to sort your Calendar by name in Lightning, but you can choose different color for your Calendars.
Now you can add new event sync the Calendar with Google Calendar. Unplug your network cable or shut down your wireless connection, you should be able to make changes and modify your event. Re-connect your computer to the Internet and sync again.
WALA! You can now take Google Calendar with you anywhere in the World.
Final thoughts. I can’t really speak for Mac and Linux user regarding to this solutions. However, I believe they are similar because the universal interface. It has been a great journey to use Google Calendar for day to day business operation and personal events.
Please let me know if it works for you on Mac or Linux. Thank you so much for reading this long post. I hope you enjoy it!